Posted on

The Tactical Games

What Happens When CrossFit Meets Competitive Shooting? The Tactical Games.

Ever wonder what happens when you mash up CrossFit, competitive shooting, and 100-degree Iowa heat? You get The Tactical Games. It’s chaos, community, and adrenaline rolled into one. Here’s how my first one went—and almost didn’t happen.

A few years ago, I first started seeing videos about The Tactical Games. I’d been into shooting for years and was really starting to get into fitness as well. So TTG really intrigued me. If you’re not familiar with The Games, think of it as a mix of CrossFit and competitive shooting. Basically, you go out and do something extremely physically exerting, then immediately shoot with an elevated heart rate.

Preparing for the Big Day

There are matches all over the United States. Luckily, there’s one in Iowa every July — Searsboro, to be exact, which is about a three-hour drive from me. I first heard about it in June of ’23, so there just wasn’t enough time for me to get in shape, train, and get the gear I needed. But I decided I was all in for the next year. I told everyone I knew I was planning on doing it — partly to hold myself accountable, and partly so people wouldn’t think I’d lost my mind when they saw me running all over town in a plate carrier. (Yep, you have to wear one while you compete: 15 lbs for men, 12 for women.)

I didn’t know anyone who had ever done it, so I started watching every video I could find, running in my plate carrier to get used to it and dry-firing and shooting whenever I could. I gathered gear and started setting it up in a way I thought would work for me, and got signed up. July came around — and I almost didn’t make it.

I was as ready as I thought I could be. But two weeks before the event, I started feeling awful. No big deal, I told myself. I had two weeks; I’d be fine by then. Then it was a week out — and I still felt like death. My stomach was queasy, I had headaches, and just felt off. But I packed my gear and hoped for the best. Yeah, yeah, I know what you’re thinking: why didn’t you just go to the doctor? I was always one of those guys that only went when he was positive he was dying, and I wasn’t there yet. I’ve since changed my ways a bit in my self-improvement journey, but I digress.

The Event Begins

The Games are a Saturday-Sunday event. The safety brief — mandatory for everyone — is at 6 a.m. each morning. Across the two days, there are eight stages. Each stage is a different event, anywhere from a few minutes to half an hour long. Some are purely shooting, but most combine shooting with physical tasks — often involving sandbags — designed to exhaust you, spike your heart rate, and push you to your limit. Then you shoot again, either with a pistol, rifle, or both. Saturday usually runs until 6 or 7 p.m., and Sunday you do it all again.

Keep in mind: this is July. In Iowa. In the middle of a cornfield. (Technically not, but close — Big Springs Shooting Complex is awesome.) I’d been feeling terrible for two weeks. Friday rolled around — the day I was supposed to leave. My hotel was booked, everything was packed, but I still felt like trash. I had worked too hard to back out, so I put it out of my mind and went anyway. I figured I’d make the call in the morning.

The alarm went off at 4:30 a.m., and I still felt the same. But I’d come too far to quit. I told myself, “You’ve powered through for two weeks — what’s another two days?” The forecast called for 95 and 96 degrees that weekend. How bad could it be?

Anyway, enough of my pity party. Let’s get to the actual event. The first thing I noticed when I pulled in was Tent City — a massive patchwork of canopies where spectators and competitors hang out during downtime. There were hundreds of people — competitors, families, and friends — and the sense of community was immediately obvious. Everyone was helpful. People offered to help set up tents, share advice, or (in my case) explain how the squad matrix worked — that’s the sheet with your number on it that tells you where to be all weekend.

You’re grouped with four other competitors in a squad, and you run each stage together all weekend. When you don’t know a soul, it’s an awesome way to meet people and build camaraderie. There’s nothing like “embracing the suck” together to form bonds fast.

Intensity of the Stages

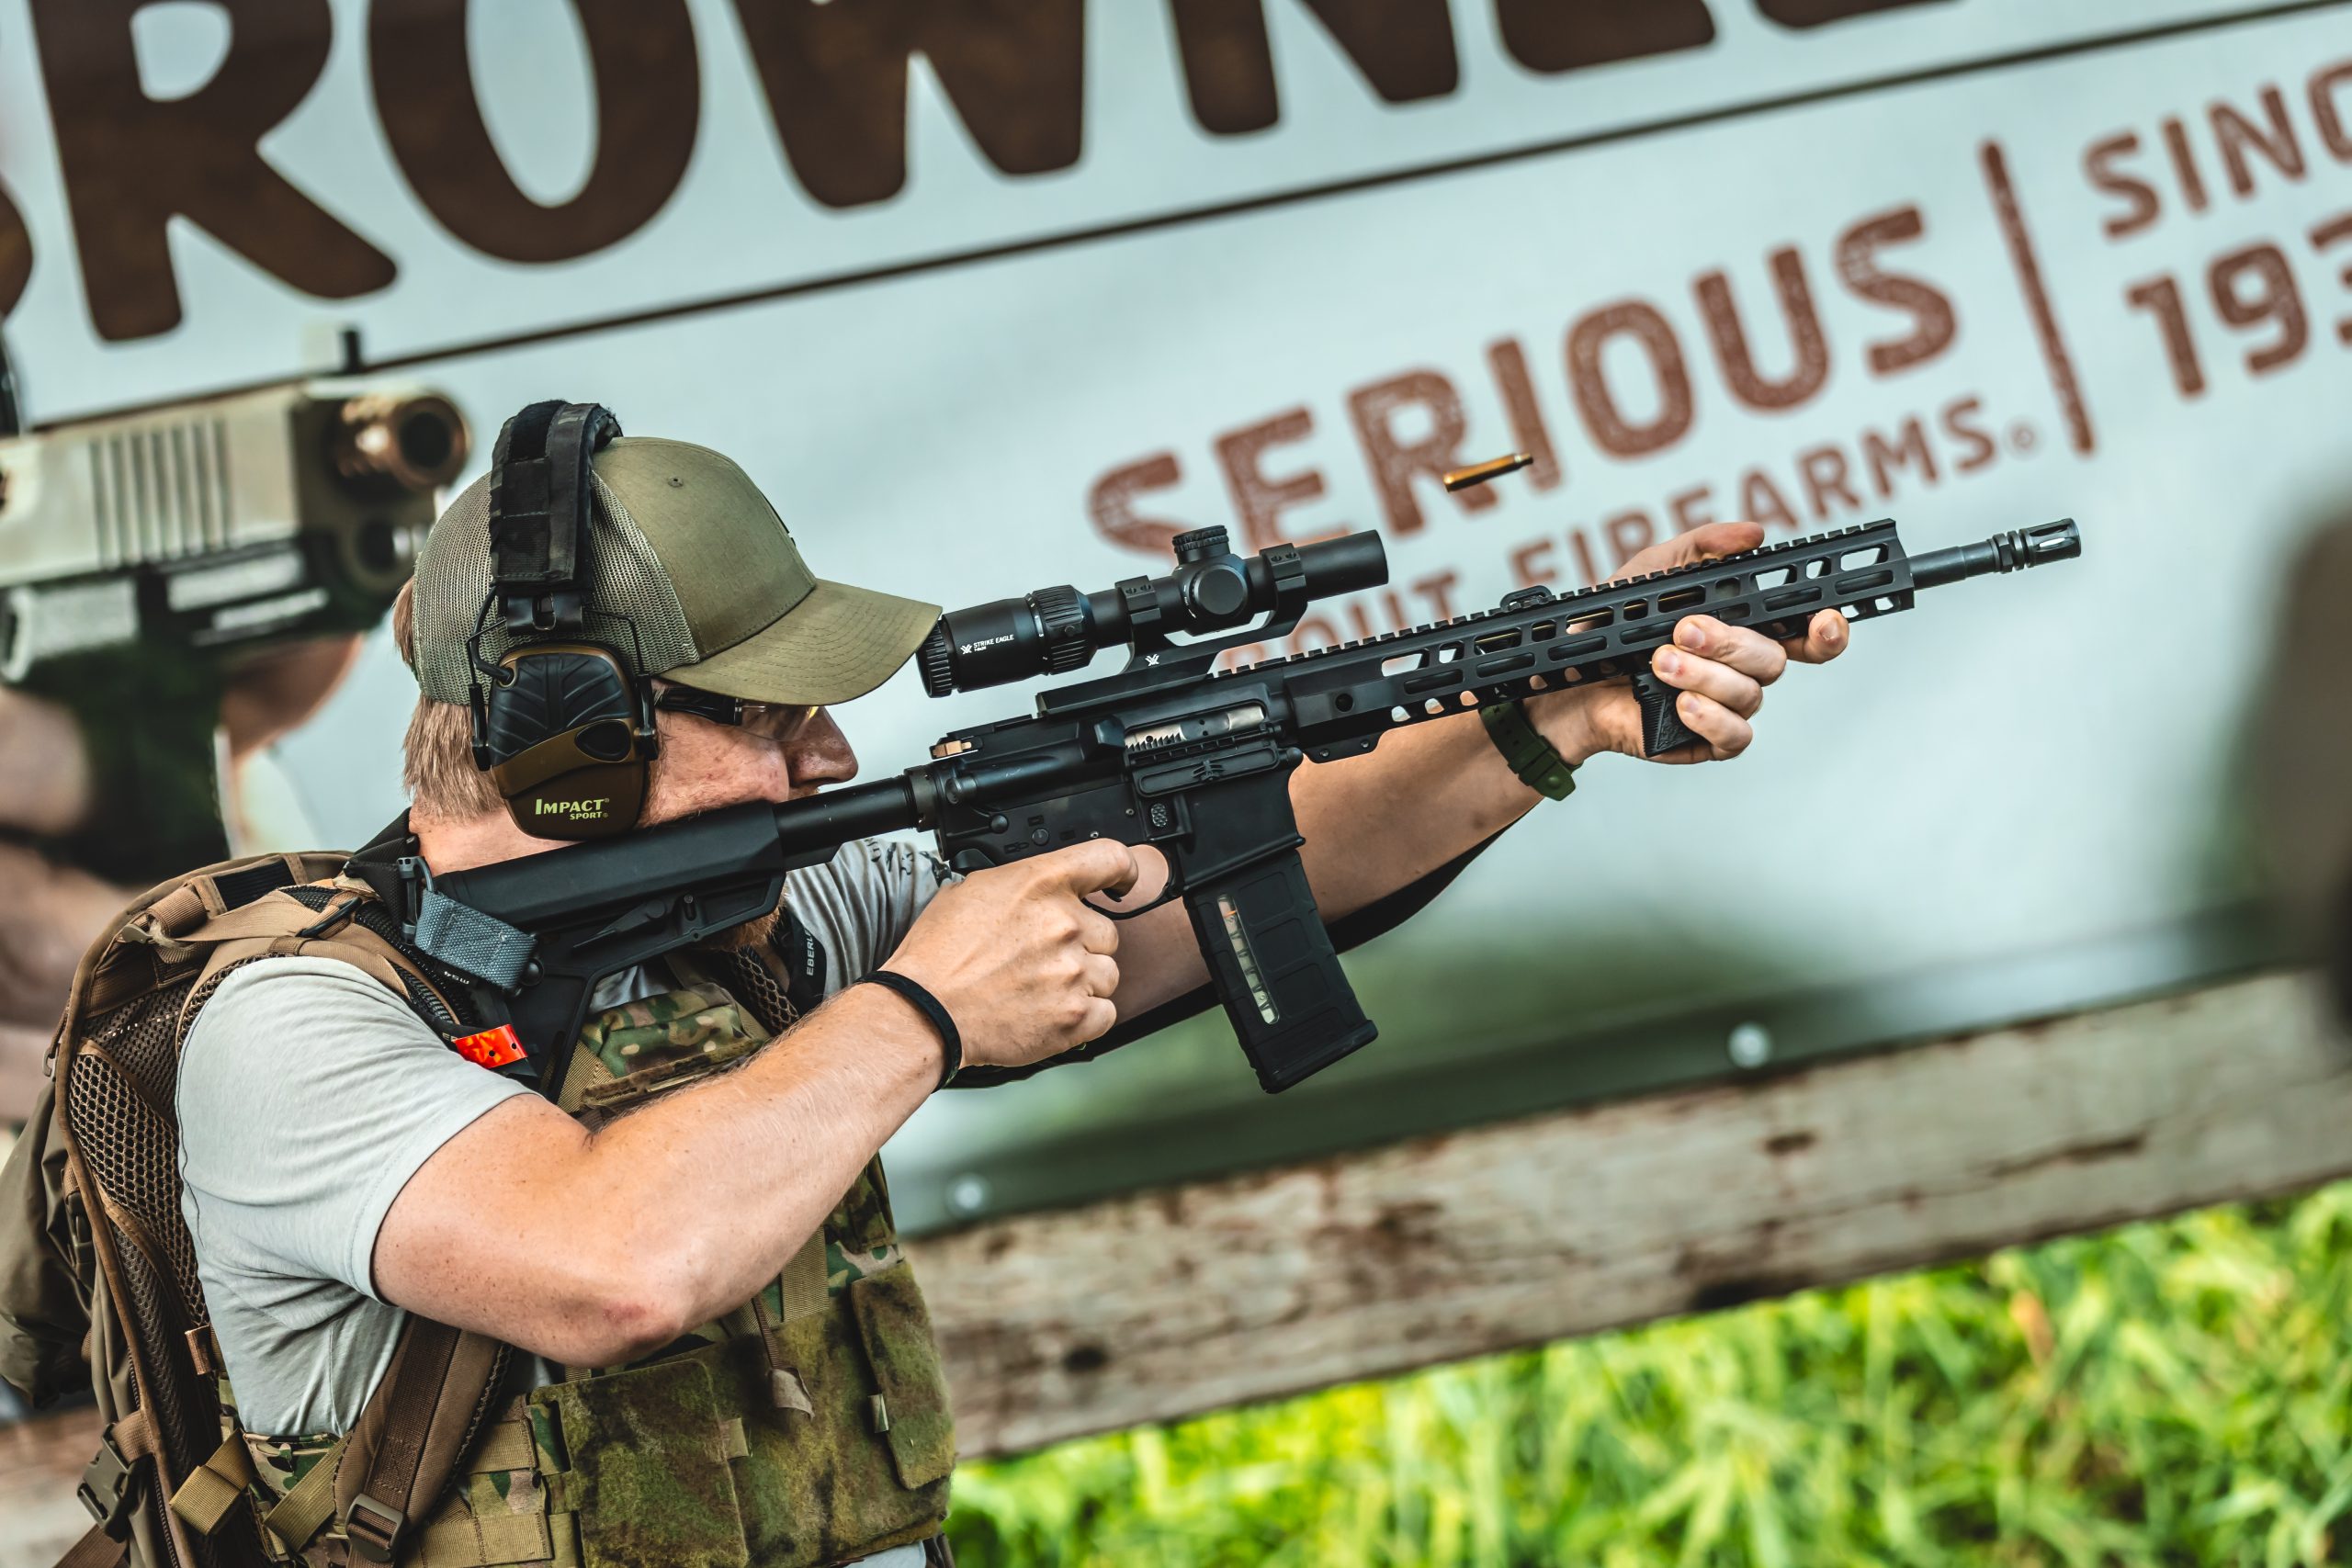
Some events have multiple firing lanes, so you compete side by side; others are one at a time. That first year, I was surprised at how intense it was. This isn’t a USPSA match you can stroll into and expect to do alright. This event is designed to grind you down — physically and mentally — and show you what you’re made of. If your only “training” is standing at the range shooting paper targets with a resting heart rate, do you really think you’re prepared to defend your life — or, God forbid, your loved ones — in a high-stress, exhausting situation? The Tactical Games won’t replicate that perfectly, but it’s definitely getting there.

I’ve always been fairly fit, but that first year kicked my butt. The heat never bothered me too much — when I’m competing, I’m locked in on the task at hand. The same went for how I felt. Sometimes you just have to grit your teeth and push through. I didn’t start feeling better until the next week, but I don’t think it affected my performance much. I was still surprised by how demanding it was — and I loved it. There’s nothing better than finding out what you’re actually made of.

There’s a fair amount of downtime at these events — time to nap, read, or meet new people around Tent City. Every competitor has at least two guns: a rifle (usually an AR) and a pistol. When you’re not competing, they’re under your tent, so walking through Tent City feels like wandering through a giant armory. Guns, ammo, gear, and plate carriers everywhere. But everyone looks out for each other — if you’re away, your neighbors keep an eye on your stuff and vice versa. That’s pretty darn cool.

Competing and Results

There are several different classes to compete in. Check them out here. I’ve competed in Intermediate both years. That first year, I finished right in the middle of the pack, which I was thrilled with. I’d never done anything like it before, didn’t know a soul, and still went down there, worked my butt off, and beat half the field. No complaints.

Needless to say, I was hooked. So of course I went again this year — and it was a different story. I knew what to expect. I knew how to train, what weaknesses to address, what gear changes to make — and that a wagon is a necessity (trust me). I also brought my girlfriend this time. It’s amazing how much having someone there to support you changes the experience.

This year, I trained harder, smarter, and was in much better shape — and it paid off. I finished 16th out of 59 competitors. I was super happy with that. I know where I need to improve next year, and I know where I have real strengths.

Final Thoughts

There’s a lot to be said for being content — and I am. But there’s always room to grow. Next year, I’m aiming for the top 3. I know it’s possible, and I’m going to work my butt off to get there. Hopefully you’ll join me in this game. It’s intimidating, and yes, it’s a big investment of time and money. But I promise you this: it’s worth it.

If you’re interested, feel free to reach out — I’ll help however I can. Check out TTG’s page for new competitors.

~Sam

Return To Schiwerks Media


Posted on

CZ Cordless Hole Punch!

milwaukee fuel m12 cerakote with case

CZ Shadow 2 Compact — Milwaukee M12 “FUEL” Build

We just finisheda CZ Cordless Hole Punch! Another fun, custom Cerakote build on a CZ Shadow 2 Compact inspired by Milwaukee’s M12 FUEL look. This one came together as a full-package themed build: Cerakote, Vytol grips, Vortex optic, ported barrel and slide, mags, and a matching case.

What’s been customized?

  • Cerakoted the frame and slide in a Milwaukee-inspired palette with the signature red and black contrast for that tool-like “FUEL” vibe.
  • Cerakoted a Vortex Defender red-dot to match.
  • Installed Vytal Grips for improved grip and a finished look.
  • Mag baseplates were finished with a red lithium-ion “battery” look to mimic an M12 cell — a small touch that sells the theme.
  • Barrel was ported by Cajun Gunworks.
  • Cerakoted a Nanuk gun case to look like a Milwaukee PACKOUT case so the whole package travels in style.

The strength of a themed build is in the details. Matching the optic, magazine, and even the case creates a consistent visual story that creates the real tool look.

Want one like this?
If you’ve got a theme in mind — team colors, tool-theme, movie/TV, badass camo, or just something that screams youhit us up. We handle Cerakote, laser engraving, optic Cerakote, and some optic cuts to make a full package.

~Sam

Return To Schiwerks Media


Posted on

Whiskey and Worship

Whiskey Worship Holy Smokes

My absolute favorite part of owning this Cerakote shop, hands down, has to be the Whiskey & Worship event we hold here every month. Nope, we ain’t worshiping the whiskey, so let me explain.

A year or so ago a good friend of mine, Greg, mentioned he thought it would be neat to hold a Bible study where we could have a cigar or sip on a bit of whiskey while we chat. I immediately thought that was a great idea. My girlfriend and I had been going back to church every week for a year or two at this point and I was becoming more devoted to my faith. I still enjoyed that sip of whiskey on ice after a long day, and for some reason it always tastes so much better with a buddy.

We talked about this for a few months back and forth. I don’t think either of us really felt qualified to start such an event, I know I didn’t, but we decided to just go for it. Sometimes you just have to dive in and worry about how it’s gonna work when you get there. Funny enough, we just talked about this at our last event when we were studying Luke 24. This was after Jesus was crucified and Mary Magdalene and the women were taking oil and spices to anoint his body. In Mark 16 it says they questioned one another “Who will roll the stone away from the entrance of the tomb?” They didn’t know how it was going to be done, but they went anyways and God provided a way.

You don’t talk about Fight Club! Whiskey & Worship!

So anyway, we got together one night and hashed out a bit of how we think it should go. We came up with a few guidelines we thought were important. 1) What’s said here stays here. Kind of like Fight Club. You don’t talk about Whiskey & Worship! It’s important that men know whatever they share here is safe. Yes, we encourage you to share W&W with other men and invite them in, but whatever a man chooses to share here is not shared with anyone else.

2) Keep it about the Bible. This isn’t about the whiskey or cigars. If you’re more interested in that, there are plenty of bars to drink your fill. This is more about talking about the Bible and becoming better men. We have a few other guidelines like keep off your phone and try not to interrupt a man sharing his thoughts, but really those main two are the most important.

So we gave it a go. To say I was nervous to lead a group of men in a meeting like this would be an understatement, but it went great. We’ve been doing this now for a year. Every month there’s a different mix of men, but it’s so refreshing to be surrounded by men on a similar path as you and talking about things that actually matter, not just about sports or the weather.

One thing we’ve started doing in the second half of our meetings is asking the men, “What are you struggling with?” This gives them a chance to vent and get things off their chest. If they have a problem and want advice, there have been many times when excellent help was given. It’s a space to unload without worry and to gain a different perspective from men walking a similar path. Proverbs 27:17 says, “As iron sharpens iron, so one person sharpens another.” That’s something we truly believe in.

Wanna join?

If you’re in the area and are interested in joining us, or maybe you want to start your own gathering, feel free to contact us! We will give you whatever help we can. We’re more than happy to help more men become part of a great group like this. It’s something society desperately needs.

I’ve started doing simple study guides for each month, available below. We generally do 2-3 chapters each month. The study guides are just simple outlines followed by some thought provoking questions to help get the conversation flowing. These will be updated every month, so bookmark this page and check back.

Feel free to use them wherever you like and give us a shout with any questions or suggestions!

If you don’t have a Bible, don’t worry. You can read online or download an app for your phone, for free, at the button below!👇

~Sam

Study Guides

Return To Schiwerks Media


Posted on

Cel-Shaded Cartoon Cerakote

cel shaded cartoon orange cerakote

The Cel-Shaded Cartoon Cerakote Trend is Here

At Schiwerks, we’re always pushing the limits of what Cerakote can do, and one of the hottest new trends we’ve been having a blast playing around with is cel-shaded “cartoon style” Cerakote .

Think of it like your favorite comic book or Saturday morning cartoon came to life on your firearm or gear — bold outlines, flat colors, and that hand-drawn, animated look. It’s eye-catching, totally unique, and guaranteed to stand out at the range.

What makes this style so fun is how versatile it is. You can go subtle with clean lines and simple colors, or go all-in with a full “animated” build that looks like it was pulled right out of a graphic novel. No two projects ever look the same, and that’s what makes cel-shading such an exciting direction for custom Cerakote.

We’ve already had the chance to knock out a few builds in this style, and the results have been awesome.

Check out more of our work in the Gallery.

We love figuring out a new style, what works and what doesn’t, and seeing our own style come to life. One of the most satisfying parts of the job!

This trend fits right in with the bigger movement toward fully custom, personality-driven Cerakote work. It’s not just about protecting your firearm anymore — it’s about making it truly yours. From realistic camo to wild colors to cartoon cel-shading, there’s no limit to where we can take it.

Want to see your gun turned into a cartoon? Hit us up — let’s make it happen. At Schiwerks, we take your ideas and bring them to life with bold, custom Cerakote that turns heads every time. Whether you’ve got a full build in mind or just want to add some comic book flair to your favorite piece, we’ve got you covered. Contact us to get your job started.

~Sam


Return To Schiwerks Media


Posted on

Inside the Cerakote Process: How We Coat and Protect Your Firearms

Picture of a cerakote dunk tank with disasembled guns parts and cerakote logo

Behind the Scenes: How We Apply Cerakote to Your Firearms

Ever wonder what goes into giving your firearm that sleek, durable Cerakote finish? It’s not just about spraying on a coat of paint and calling it a day. There’s a detailed, precise process behind it, and every step matters to ensure the finish not only looks amazing but also holds up to whatever you throw at it. Here’s a look behind the scenes of the Cerakote process.  

1 Disassembly

The first step is breaking down your firearm completely. We disassemble it down to its individual components, ensuring no part is left untouched.   If it can be disassembled, it is.  This allows us to coat every surface properly and makes reassembly seamless. It’s also crucial for ensuring that moving parts stay functional after the coating is applied.   Leaving parts assembled provides areas for grease, oil and media to hide in, causing issues later down the road.


2. Cleaning

Once the firearm is disassembled, we thoroughly clean every part that’s getting coated.  This is done in an acetone dunk tank or a ultrasonic cleaner, depending on the material. This step removes oils, dirt, or any residues that could affect the coating process. Cleaning is always done before blasting to keep the blasting media clean and free from contamination.


3. Surface Prep

Now it’s time to prep the surface. A quality job is absolutely dependent on the quality of the prep. Depending on the material, this might mean removing the current coating and blasting the part to bare metal, or, in the case of anodized aluminum or polymer, just lightly blasting to create a surface profile.  The goal is to give the Cerakote something to grip onto, ensuring a durable bond. This step also removes any rust or corrosion that may be present.


4. Masking

After prep, any areas that don’t need coating are carefully masked off.  This ensures that critical surfaces, like those that interact with other parts, remain free of coating. It’s a tedious but essential step for keeping your firearm functioning perfectly.  This step is not always needed, but on some higher end 1911s or bolt actions that have been hand fit to extremely tight tolerances, it’s a necessity.


5. Application

Now comes the fun part: applying the Cerakote. Using a spray gun, we apply the coating in thin, even layers. This ensures a smooth finish that doesn’t interfere with tolerances. We have a ton of color options and can even create custom patterns or designs to make your firearm uniquely yours. (See Gallery)  On multiple color jobs, the main layer is sprayed at the usual thickness, then flashed in the oven for 15 minutes to tack off.  After cooling, stencils and top layers can be added.  The top layers are sprayed much thinner, and only for color, which allows us to still achieve thin coatings on multiple color jobs.  


6.Curing

Once coated and flashed off, any masking and stencils are removed, then the parts go into a curing oven where the Cerakote hardens. The curing process locks in the durability and toughness Cerakote is known for, making it resistant to scratches, chemicals, and wear.  Generally, this is a 2 hour process. 


7. Reassembly

With the coating cured, we carefully check the parts for coverage and quality, and reassemble your firearm. This step involves a thorough check to make sure everything fits and functions perfectly. If it’s not 100%, it doesn’t leave our shop.


Why This Process Matters

The Cerakote process isn’t something we rush through. Every step is designed to ensure the final product not only looks incredible but also stands up to real-world use. Whether you’re customizing your firearm or protecting it from the elements, this process delivers a finish that lasts.

Have questions about Cerakote or want to discuss your next project? Contact us—we’d love to help!

Still wanna know more? Check out Cerakote’s H Series application guide for the nitty gritty, and The Art and Science of Cerakote.

~Sam

Return To Schiwerks Media


Posted on

Replace your Glock slide backplate

Close-up of a Glock slide showing the backplate being removed with a punch tool

How to Replace Glock Slide Backplate: A Simple DIY Guide:

So you got an awesome new Glock backplate from Schiwerks. Maybe you’ve never replaced anything like this before and it’s a bit intimidating. Well, let me assure you, it is super simple. I’m positive I could train a monkey to do this. This guide will walk you through the process in just a few easy steps. If you’re more of a visual learner, there’s a quick video at the bottom.


What You’ll Need

Before starting, gather these tools:

  • A small punch tool. (A screwdriver will work, but we recommend a punch.)
  • A soft cloth or gun mat to protect your work surface. Or not, you do you. We personally do everything on a gun mat.
  • Your new slide backplate.

Step 1: Clear Your Firearm and Remove the Slide

Safety first. Remove the magazine and unload your Glock completely, ensuring there’s no ammunition in the chamber. Check visually as well as with your finger. Double check. Always a good habit to get into. Remove the slide from the frame by pointing the firearm in a safe direction and pulling the trigger. Then pull the slide back just slightly and pull down on the slide lock lever on either side of the frame. Release the slide and remove it from the frame. You can download Glock’s official safety and disassembly instructions here.


Step 2: Access and Remove the Backplate

pushing down on the glock spacer sleeve to remove the backplate
Pushing down on the space sleeve

Turn the slide upside down and locate the backplate at the rear and the spring loaded spacer sleeve, which is what the backplate holds in. Press down on the spacer sleeve using your punch tool or screwdriver.

Maintain steady pressure on the sleeve while carefully sliding the backplate downward with your thumb. Keep your thumb on the back of the slide to ensure the striker spring and the extractor spring (that little button looking thing on the right) don’t go flying out. Once the backplate slides free, set it aside.

close up of removal of a Glock 19 Backplate

Step 3: Install the New Backplate

Align the new backplate with the grooves on the slide. While pressing the spacer sleeve down with your tool, gently push the backplate upward until it covers the spacer sleeve and holds it in. You can release the spacer sleeve at this point. Press down on the exactor spring and slide the backplate overtop of it as well, then continue pressing the backplate up until feel the snap into place.

Ensure the backplate is seated securely and that all internal components remain properly aligned.

sliding an American flag Glock backplate into place

Step 4: Reassemble and Test

Reattach the slide to the frame and perform a quick function check. Rack the slide and dry-fire the gun (following all safety protocols) to confirm everything operates smoothly.


Why Replace Your Glock Slide Backplate?

Many Glock owners swap backplates to personalize their firearm with custom designs, swap out the plastic piece for a metal one, or refresh the look of their pistol. It’s a great addition to add to a custom cerakoted project as well for that extra touch that really puts it over the top. It’s an easy way to make your Glock feel truly yours without breaking the bank.


Swapping out your Glock slide backplate is a quick and affordable project that adds a touch of customization to your firearm. With just a few simple tools and a little attention to detail, you can easily upgrade your Glock in just a few minutes. Hope this helped!

~Sam

Super quick video showing the process below.👇

Return To Schiwerks Media


Posted on

Topographic Cerakote

topgraphic tan and black cerakote AR

Lately, we’ve been diving into topographic Cerakote, and it’s easy to see why it’s such a crowd favorite—it looks so dang sharp. This technique combines precision, creativity, and a little bit of science to produce awesome results. If you’ve been following our work on Facebook, you’ve probably seen a few examples in our gallery.

The usual method we’ve been using for topographic Cerakote involves spraying one or two colors, then adding darker outlines to define the lighter tones. Afterward, a laser is used to bleach the Cerakote, changing the color. Basically, it burns the cerakote slightly, leaving all the protective properties, but slightly changing the color in that specific area. While this method looks great, certain color combinations, like tan and black, deliver a contrast that is truly badass.


Taking Topographic Cerakote to the Next Level

We wanted to push the boundaries a bit. Instead of the typical single-layer approach, we layered black Cerakote on the base, followed by a tan topcoat, and finished it off with a dark brown outline. Once the layers were flashed, we used a laser to burn through the tan top layer, revealing the black beneath. It’s a process that take a lot of testing to achieve, but it allows you to do far more intricate work that the usual methods just using stencils can ever achieve.

This process wasn’t without its challenges. Unlike flat surfaces, uneven levels on the firearm can make consistency a little trickier. And while the design speaks for itself, we owe a big shoutout to Ballistic Imagery for capturing these pieces so beautifully in photos.


What’s Your Take on it?

What do you think of this topographic cerakote style? Is it something you’d rock on your edc, maybe just hang it on the wall, or are you a “guns are black” kinda guy? Let us know below.

~Sam

Return To Schiwerks Media


Posted on

The Resurgence of Lever Action Firearms: Old West Meets Modern Tech

Modern lever action rifle with custom modifications and optics"

In recent years, there’s been a noticeable uptick in the popularity of lever action firearms. These classic rifles, long associated with the American Old West, are experiencing a renaissance among modern shooters. But what’s driving this trend, and how have these traditional firearms adapted to the 21st century? Modernized lever actions are playing a big role.

A Blend of Nostalgia and Innovation

Lever action rifles have always held a special place in American gun culture. Their connection to frontier history and their iconic status in Western films give them an undeniable appeal. However, today’s renewed interest goes beyond mere nostalgia.

Modern manufacturers and custom shops, especially Midwest Industries and Mad Pig Customs, have breathed new life into the platform, updating these classic designs with contemporary materials and features. Lightweight alloys with modern machining techniques, improved optics, and enhanced ergonomics have made lever guns more practical and versatile than ever before. We just had the pleasure of doing a “modernized” lever action. This particular one was a Henry Model X 45-70, customized with Midwest Industries parts, shown in the pics on this article.

The Mad Pig Customs Effect

One of the companies that’s played a significant role in this lever action revival is Mad Pig Customs, owned by Steve Tyliszczak. This innovative custom shop has pushed the boundaries of what’s possible with lever action rifles, creating eye-catching and highly functional builds that have captured the imagination of gun enthusiasts.

Mad Pig Customs has become known for their unique approach, which often includes:

  • Modern optics mounting solutions
  • Custom cerakote finishes
  • Enhanced furniture and ergonomics
  • Improved action work for smoother operation

Their builds, showcased all over social media, and even making it onto the big screen in John Wick 3, have inspired both individual gun owners and other manufacturers to explore the potential of modernized lever actions. And let’s be honest, have caused a lot of drool on phone screens from gun guys who’ve stumbled across their awesome designs. Check out more about Mad Pig on their website and an article from Free Range American here.

Why Lever Actions Now?

Several factors contribute to the current popularity of lever action rifles:

  1. Versatility: Modern lever guns have became huge for hunting, target shooting, and we’ve even seen them used by some for home defense, although that’s not something we generally recommend in the age of semi-autos and higher capacity options.
  2. Legal considerations: In some regions with strict gun laws, lever actions face fewer restrictions than semi-automatic rifles.
  3. Ammunition compatibility: Many lever actions can use common handgun calibers, simplifying ammo logistics for some shooters.
  4. Shooting experience: The unique manual of arms provides a different and often enjoyable shooting experience compared to semi-autos.

As more shooters discover the potential of these updated classics, it’s likely we’ll continue to see innovation and growth in the lever action market. The fusion of Old West charm with modern firearm technology has created a category that appeals to a wide range of enthusiasts, bridging the gap between tradition and contemporary shooting sports.

So while we here at Schiwerks can’t think of a reason we really NEED a modernized lever action, it’s more of a issue of want for us. And we definitely see one of these in our future. How about you?

~Sam

A few other lever actions we’ve done.


Return To Schiwerks Media


Posted on

AR Mag Holders Produced in House!

AR magazine holder

For the past several months I’ve been posting about AR mag holders. Well, they’re finally live on the website. Check ’em out here. And for a limited time, you can get one free! Just spend $50 on the website and write in the order comments, or message us that you would like one. That’s it.

They’re designed and printed by us, all in house. Now you may be saying to yourself “phft, it’s just 3d printed crap.” And a year ago, I would have agreed with you. But now, seeing how far technology has come in the last few years, I’m absolutely amazed at what these machines can produce.

I got into 3d printing exactly a year ago now. Initially I was interested in it as a way to learn 3d modeling and eventually transition into CNC milling, which has always been something I’ve been interested in. That’s still in the plans. But I became absolutely fascinated that you could design a 3d model on your computer, and in a few short hours, sometimes less, be holding the physical product in your hands. What a world we live in.

I started with the usual entry level 3d printer, a Creality Ender 3v2. They can be had for a few hundred bucks, but I will say that I was blown away at the quality this thing could produce. I even printed a few pistol frames that I’m still using to this day. Yes, you can print gun parts on them, and yes, they are absolutely functional. (Joe Biden be damned.)

The more I learned and the more I printed, the more impressed with the technology I became. And the more I wanted to somehow incorporate 3d design and printing into Schiwerks. My printer is by far and away my favorite piece of equipment in the shop. And that’s saying something, as I have some awesome equipment. Freakin’ lasers man. But that’s a post for another time.

I’ve made jigs that save me a ton of time and effort. Specialty tools for specific projects. An entire attachment system for tools that goes above our workbench. So it just seemed right to make something in house that our customers would enjoy as well.

We invested in a new printer a few months back: a Bambu Labs X1 Carbon. I’ve been absolutely blown away by this thing. It prints 4-5 times faster than our other printer, with some features that make it an absolute dream to run.

This is where all those mag holders will be brought to life. My plan is to expand our offerings to include holders for other magazines (pistol, AR10, etc) and eventually even mounts to mount rifles and pistols on your walls.

It’s not that I’m just looking for stuff to sell. It’s the fact that I absolutely love designing something from scratch and seeing it come to life. And these are things that I personally use and love. So it only makes sense for me to bring these products to Schiwerks.

Wrapping this rather long post up, I would like to encourage you to check out 3d printing. Dip your toes it. It’s a bit overwhelming at first, but it’s an awesome hobby that can transition into so much more. Feel free to reach out to me with any questions you may have. And until then, happy printing!

~Sam

Return To Schiwerks Media


Posted on

Black Box Edition Guns

black box edition glock

We do guns for customers. It’s what we do. Take their idea of how they want their gun to look and make it a reality. And we love it. But recently, we decided we want to do some guns the way WE want them. And the “Black Box Edition” line was born.

We take a new gun, add stippling, cerakote, optic, maybe a new slide, whatever makes it a truly custom, one off piece that will live up to the Schiwerks name. Then we put it in a black box with laser cut foam and a laser engraved brass coin with it’s Black Box serial number and then offer it to our customers.

These will be extremely limited numbers. We figure anywhere from six to a dozen a year. Keep your eye out for these, we’ll push them out on social media and email when they drop. See if you can get your hands on one of these extremely limited edition firearms.

~Sam

Return To Schiwerks Media


Posted on

Spike’s Warthog & Samurai

Spikes Tactical Warthog Receiver

Spike’s Tactical is one of the companies putting out these awesome face lowers.

They’re extremely popular, especially in the cerakote industry. There have been countless cerakote jobs put on them, but we like to think ours is a bit different from all the rest. We spent a lot of time on the details of this and are extremely happy how they came out.

What do you guys think? How’d we do?

As usual, props to Ballistic Imagery for the photos.

~Sam

Return To Schiwerks Media


Posted on

Craftsmanship: Woodworking, Kydex, Cerakote, And What Drives Us.

holster wallet
Over the past five generations, this family’s style of craftsmanship has changed. But the quality has always been there, and always will be.

The Schiwerks Way

(1/28/2018) – First things first, thank you thank you thank you for being interested enough in our company to click on this. We’ve worked hard and come a long way, and along that way, every single person that’s “liked”, “shared”, bought, or commented on any one thing that we’ve done has meant more to us than you’ll ever realize. In today’s world of Facebook, Instagram, Twitter, Snapchat, etc., you would think building a website and driving enough traffic to it to generate an income wouldn’t be all that hard. But I’ll tell ya right now, it has not been easy. It has been hard, it has been frustrating, and at times, even a little maddening. We’re not even close to achieving what we know we can, and without you, none of it is even possible. So, sincerely, thank you.

Now, to the reason I’m writing this. We want you to know who we are. What we stand for. Why we’re “different”.

If you’ve had any interest in us prior to this point, you’ve probably figured out that this company consists of Sam, the owner, and myself, Jesse. We’re a couple of brothers who are probably more alike than we’d like to be.

Growing up, we spent a lot of time in Dad’s wood shop. And he did the same with his dad. Four generations of this before us. Somehow, in a town of less than 400 people, he managed to make a living and provide for Mom and their four children. A woodworker. In a town of less than 400. And he made it work. Churning out some of the best damn woodworking you’ll ever see. Hell, his projects have even made the newspaper! It was a horse-drawn hearse, and it was frickin’ impressive. He’s the purest definition of a craftsman.

Sam and I, while we did “dabble” in wordworking a little bit, it just wasn’t for us. Out of high school, Sam went to college for collision repair and mechanics. Up until January 1, 2018 that has been his life.

I don’t know how much you know about automotive paint. But it can be a real pain in the ass. Now, we’ve both been doing it long enough where it just kind of comes naturally, it’s not really something we have to think about. Of course, there are still times when we’ll get our ass kicked by color-matching a white pearl tri-coat, but that’s a whole different story.

What we’ve developed an eye for throughout the years are tiny little imperfections. Imperfections that most people would never notice, or if they did notice, probably wouldn’t even care about. Not only did we develop an eye for these things, we both grew to REALLY hate having an imperfection in our paint. We both know we can create a perfect finish with relative ease. So why let that one little thing fly?

Body work and paint translates perfectly to what both of us do. For Sam, cerakote is just another day in the shop.

Myself, I was kind of a computer guy. I decided to go to college for Computer Aided Drafting. Sam was working in Kansas City, and I had just been accepted down there. A few hours after I graduated high school, I drove down there and moved in with him. That went….poorly, to say the least, and before I even started school, I moved back home and started working construction.

After about a year of that, we were on vacation, and I still had no idea what I was doing with my life. We were sitting on a dock at the Lake of the Ozarks, and my oldest brother said, “Well, why not do what Sam does?”

Yeah, why not? I’d had an interest in cars before, I had just never really thought of it. A couple months later, I was done working construction, and I’ve kind of been unintentionally following Sam’s footsteps ever since.

I’ve been doing collision work now for eight years. I loved it, for a long time. And I probably will for a long time to come. But at this point, I need a challenge. I need a change. I need something bigger, something that matters. I can’t speak for Sam, or why he chose to start Schiwerks. But I do know that he is passionate about what he does, and that neither of us will quit until we succeed.

At first, making holsters was just a nice change of pace from the monotony of beating out dents. A nice hobby. Then Sam asked if I’d like to sell them under Schiwerks. There’s the challenge. An even bigger challenge: helping him create a brand that can make a difference.

Although expert craftsmanship has been in our blood for five generations now, and we’ve both learned to be maybe a little bit over-critical of our work from our time as body-men, giving you a superb product isn’t our lone top priority.

We put everything we have into our products. Our time, our money, and on multiple occasions I’ve put quite a bit of blood into it, never cried though. Man stuff, ya know. And when we’re done putting in, we put out. Err….donate. Sorry.

We recognize that without our military, we wouldn’t be where we are, doing what we’re doing. We aim to give back to those who deserve it most. To support those who defend us. Who’ve literally given their everything.

We’re just a couple of freedom-loving brothers, and we’re just getting started. Just wait until you see what we can do.