Posted on

Inside the Cerakote Process: How We Coat and Protect Your Firearms

Picture of a cerakote dunk tank with disasembled guns parts and cerakote logo

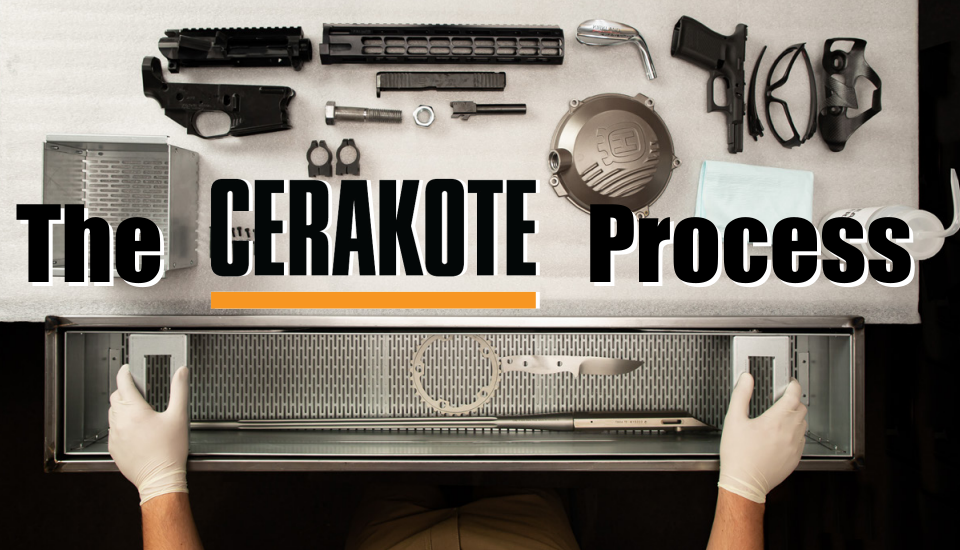
Behind the Scenes: How We Apply Cerakote to Your Firearms

Ever wonder what goes into giving your firearm that sleek, durable Cerakote finish? It’s not just about spraying on a coat of paint and calling it a day. There’s a detailed, precise process behind it, and every step matters to ensure the finish not only looks amazing but also holds up to whatever you throw at it. Here’s a look behind the scenes of the Cerakote process.  

1 Disassembly

The first step is breaking down your firearm completely. We disassemble it down to its individual components, ensuring no part is left untouched.   If it can be disassembled, it is.  This allows us to coat every surface properly and makes reassembly seamless. It’s also crucial for ensuring that moving parts stay functional after the coating is applied.   Leaving parts assembled provides areas for grease, oil and media to hide in, causing issues later down the road.


2. Cleaning

Once the firearm is disassembled, we thoroughly clean every part that’s getting coated.  This is done in an acetone dunk tank or a ultrasonic cleaner, depending on the material. This step removes oils, dirt, or any residues that could affect the coating process. Cleaning is always done before blasting to keep the blasting media clean and free from contamination.


3. Surface Prep

Now it’s time to prep the surface. A quality job is absolutely dependent on the quality of the prep. Depending on the material, this might mean removing the current coating and blasting the part to bare metal, or, in the case of anodized aluminum or polymer, just lightly blasting to create a surface profile.  The goal is to give the Cerakote something to grip onto, ensuring a durable bond. This step also removes any rust or corrosion that may be present.


4. Masking

After prep, any areas that don’t need coating are carefully masked off.  This ensures that critical surfaces, like those that interact with other parts, remain free of coating. It’s a tedious but essential step for keeping your firearm functioning perfectly.  This step is not always needed, but on some higher end 1911s or bolt actions that have been hand fit to extremely tight tolerances, it’s a necessity.
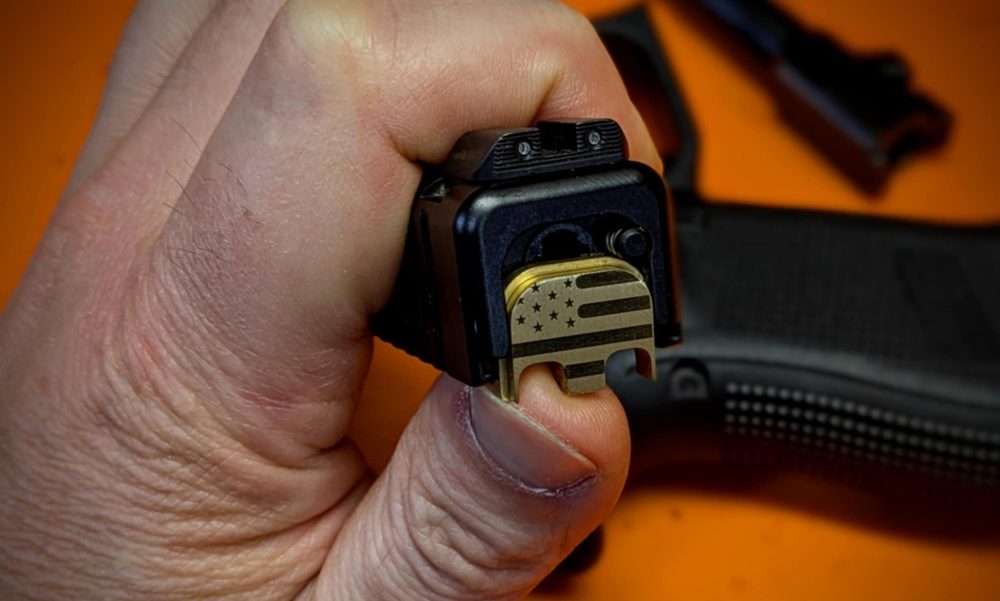

5. Application

Now comes the fun part: applying the Cerakote. Using a spray gun, we apply the coating in thin, even layers. This ensures a smooth finish that doesn’t interfere with tolerances. We have a ton of color options and can even create custom patterns or designs to make your firearm uniquely yours. (See Gallery)  On multiple color jobs, the main layer is sprayed at the usual thickness, then flashed in the oven for 15 minutes to tack off.  After cooling, stencils and top layers can be added.  The top layers are sprayed much thinner, and only for color, which allows us to still achieve thin coatings on multiple color jobs.  


6.Curing

Once coated and flashed off, any masking and stencils are removed, then the parts go into a curing oven where the Cerakote hardens. The curing process locks in the durability and toughness Cerakote is known for, making it resistant to scratches, chemicals, and wear.  Generally, this is a 2 hour process. 


7. Reassembly

With the coating cured, we carefully check the parts for coverage and quality, and reassemble your firearm. This step involves a thorough check to make sure everything fits and functions perfectly. If it’s not 100%, it doesn’t leave our shop.


Why This Process Matters

The Cerakote process isn’t something we rush through. Every step is designed to ensure the final product not only looks incredible but also stands up to real-world use. Whether you’re customizing your firearm or protecting it from the elements, this process delivers a finish that lasts.

Have questions about Cerakote or want to discuss your next project? Contact us—we’d love to help!

Still wanna know more? Check out Cerakote’s H Series application guide for the nitty gritty, and The Art and Science of Cerakote.

~Sam

Return To Schiwerks Media


Posted on

10 Reasons Why Cerakote Is the Best Choice for Your Firearms and Gear

image of an iwata paint gun spraying cerakote, 10 reasons why cerakote is the best for your firearms

When you’re looking to protect your guns, tools, or gear, making the right choice in coatings can make all the difference. Cerakote is hands-down one of the best options out there, and for good reason. It’s tough, it’s customizable, and it’ll keep your stuff in great shape for years. Let’s break down why Cerakote is the real deal. Here’s 10 Reasons Why Cerakote Is the Best Choice for Your Firearms and Gear.


1. Stops Rust in Its Tracks

If you’ve ever experienced opening your gun case and seeing a firearm you’ve spent good money on covered in rust, you’ll get the need for Cerakote.   Cerakote creates a barrier that blocks moisture and chemicals from eating away at your gear. Whether it’s hunting in the rain or storing your gun in the safe, you’ll be glad for the extra layer of protection.   The protection is worth the cost.  Check out the science of it here.


2. Make It Yours

One of the coolest things about Cerakote? The customization. You can go with a classic black strictly for protection, wild colors to stand out, or even detailed camos to blend in. Want a topographic map design or a custom logo? You got it. With Cerakote, your gear can look as good as it performs. Check out some of our previous projects in the Gallery.


3. Tough as Nails

Cerakote isn’t just durable—it’s built to take a beating. It stands up to heat, scratches, and the daily wear and tear of life. That said, let’s keep it real—we’re not gonna blow smoke up your keister, it’s not some magic coating. Dragging it over rocks or smashing it into hard surfaces will still scratch or leave a mark. Even so, for most everyday adventures—whether you’re trekking through the woods or throwing your gear in the back of your truck—Cerakote does an outstanding job of keeping your stuff protected.


4. Boost Your Gear’s Lifespan

Adding Cerakote isn’t just about looks—it’s about extending the life of your gear. By reducing wear and tear, rust, and other damage, you’re ensuring that your firearms and tools last much longer than they would without it. Think of it as an investment in longevity and performance.


5. Better Performance

Here’s something people don’t always think about: Cerakote can actually improve how your gun works. It cuts down on friction between moving parts, making everything run smoother. Cerakote was designed to be thin enough to be applied to critical components of firearms, not affect their tolerances, but still add a level of protection and lubricity.   That said, make sure a professional is applying the coating so it is done correctly. (Applied incorrectly, it can have the opposite effect.)


6. Protect Your Investment

Firearms aren’t cheap. Scratches, rust, or fading can tank their value fast. Cerakote helps preserve your gear, keeping it in great condition for years. If you ever decide to sell, a firearm in good shape is just worth more.


7. Not Just for Guns

Cerakote isn’t just for your rifle or pistol. You can coat magazines, scopes, grips, other accessories, even sunglasses, cups, parts on your dirt bike,  knives, the list is literally endless. We’ve even done custom Cerakote on flamethrowers!  It’s a great way to make your whole setup look sharp.


8. Handles the Heat

Cerakote can take the heat—literally. It holds up under extreme temperatures, so it’s perfect for suppressors, barrels, and other parts that get hot.   There is even a Cerakote series for exhaust: perfect for your motorcycle or snowmobile.  You’ll never have to worry about it failing under pressure.


9. Worth Every Penny

Compared to other coatings, Cerakote gives you the most bang for your buck. It’s a one-and-done deal that keeps paying off. Your gear stays protected and looks awesome for the long haul. Look at how some of the other coatings on the market compare on Cerkote’s page.


10. Used by the Pros

Cerakote isn’t just popular with hobbyists. Law enforcement, gun manufacturers, military, and competitive shooters all rely on it. If it’s good enough for the pros, it’s definitely good enough for you.


Why Work with Us?

At Schiwerks, we take Cerakote seriously. Whether it’s a single firearm or a whole batch of accessories, we put in the time to make sure every project looks amazing and holds up to your toughest tests. Got an idea for a custom design? Let’s make it happen.


Ready to Get Started?

If you’re ready to upgrade your gear with Cerakote, give us a shout. We’d love to help protect and customize your equipment to match your style and needs.

~Sam

Return To Schiwerks Media


Posted on

Replace your Glock slide backplate

Close-up of a Glock slide showing the backplate being removed with a punch tool

How to Replace Glock Slide Backplate: A Simple DIY Guide:

So you got an awesome new Glock backplate from Schiwerks. Maybe you’ve never replaced anything like this before and it’s a bit intimidating. Well, let me assure you, it is super simple. I’m positive I could train a monkey to do this. This guide will walk you through the process in just a few easy steps. If you’re more of a visual learner, there’s a quick video at the bottom.


What You’ll Need

Before starting, gather these tools:

  • A small punch tool. (A screwdriver will work, but we recommend a punch.)
  • A soft cloth or gun mat to protect your work surface. Or not, you do you. We personally do everything on a gun mat.
  • Your new slide backplate.

Step 1: Clear Your Firearm and Remove the Slide

Safety first. Remove the magazine and unload your Glock completely, ensuring there’s no ammunition in the chamber. Check visually as well as with your finger. Double check. Always a good habit to get into. Remove the slide from the frame by pointing the firearm in a safe direction and pulling the trigger. Then pull the slide back just slightly and pull down on the slide lock lever on either side of the frame. Release the slide and remove it from the frame. You can download Glock’s official safety and disassembly instructions here.


Step 2: Access and Remove the Backplate

pushing down on the glock spacer sleeve to remove the backplate
Pushing down on the space sleeve

Turn the slide upside down and locate the backplate at the rear and the spring loaded spacer sleeve, which is what the backplate holds in. Press down on the spacer sleeve using your punch tool or screwdriver.

Maintain steady pressure on the sleeve while carefully sliding the backplate downward with your thumb. Keep your thumb on the back of the slide to ensure the striker spring and the extractor spring (that little button looking thing on the right) don’t go flying out. Once the backplate slides free, set it aside.

close up of removal of a Glock 19 Backplate

Step 3: Install the New Backplate

Align the new backplate with the grooves on the slide. While pressing the spacer sleeve down with your tool, gently push the backplate upward until it covers the spacer sleeve and holds it in. You can release the spacer sleeve at this point. Press down on the exactor spring and slide the backplate overtop of it as well, then continue pressing the backplate up until feel the snap into place.

Ensure the backplate is seated securely and that all internal components remain properly aligned.

sliding an American flag Glock backplate into place

Step 4: Reassemble and Test

Reattach the slide to the frame and perform a quick function check. Rack the slide and dry-fire the gun (following all safety protocols) to confirm everything operates smoothly.


Why Replace Your Glock Slide Backplate?

Many Glock owners swap backplates to personalize their firearm with custom designs, swap out the plastic piece for a metal one, or refresh the look of their pistol. It’s a great addition to add to a custom cerakoted project as well for that extra touch that really puts it over the top. It’s an easy way to make your Glock feel truly yours without breaking the bank.


Swapping out your Glock slide backplate is a quick and affordable project that adds a touch of customization to your firearm. With just a few simple tools and a little attention to detail, you can easily upgrade your Glock in just a few minutes. Hope this helped!

~Sam

Super quick video showing the process below.👇

Return To Schiwerks Media